

If you have purchased or planning to purchase an external wooden door, it is most likely to be supplied in unfinished timber and will require finishing prior to installation. Incorrect finishing could completely ruin the door and void the guarantee so it’s important to fully understand the process and what products are not allowed for finishing external wooden doors.
Of course you could avoid the hassle completely by getting a factory finished door set or getting your door sprayed by professionals before delivery, however majority of people will buy their front doors unfinished to be able to adjust the size of the door to fit the current frame or opening. Traditional on-site finishing with a brush or roller, be it a DIY job or done by a hired decorator, is a lot cheaper (40-70%) than professional spraying, although the results are quite different.
Professional spraying or traditional on-site application?
It’s important to realise that spraying is done in a sealed environment, using machinery that evenly applies coats of finish, and the effect is a smooth surface without any brush marks, dust particles or imperfections. The level of sheen (gloss) can be adjusted to suit individual requirements making the door surface more or less shiny. The effect is simply stunning but its cost is relatively high (in some instances can exceed the cost of the door itself) and the process usually takes between 7-10 days as the door needs to dry up to 24h between coating.
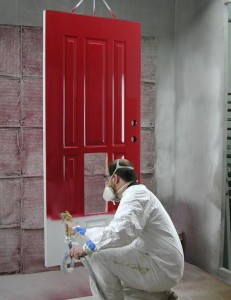
Professional spray painting. Image by goguida.com
Traditional painting/staining with a brush or roller will never provide that smooth and even finish, however it is considerably cheaper and if you have a bit of time and some utility space to work in (garage, shed etc.), it could be a nice DIY project for a long Bank Holiday weekend. You will need a can of your preferred finish (stain or paint – see What finishing product should I get?) and the usual decorator’s accessories – brushes, sponges, sanding paper, protective tapes or sheets etc. also something to lay the door on in a flat position, like an old table, two workbenches or you could just lay it flat on a protective sheet on the floor. You will probably need someone to help you turn the door over every now and then (they are heavy!).
Alternatively you can hire a local decorator to do it all for you. Make sure, he is a professional decorator with his own tools and solid decorating experience (ideally recommended by someone you know). This will be still much cheaper than spraying but it’s important to supply your decorator with correct product and that the finish is applied according to manufacturer’s instructions (see: Application)
Now it’s time to buy the finishing product you are going to use…
What finishing product should I get?
Majority of readymade external wooden doors in the UK have engineered timber construction with over veneer and products such as varnishes, oils, waxes and polishes are not suitable to use as they simply don’t offer enough protection on this type of doors. This means that the door is likely to be ruined in a year or two if you use these products.
But why? They are suitable for exterior use, it says so on the tin! Yes they are probably suitable for most solid timber products like decking, fences etc. but not for engineered timber exterior doors. These doors are made in controlled moisture environment using a number of smaller pieces of solid timber engineered to form a large door panel. They contain a specific level of moisture and if that level was to change, the smaller pieces would start moving slightly causing cracks, bubbles and similar effects appearing on the surface. This is why, there is a manufacturer’s requirement to only use a high performance exterior stain or paint on these doors to keep the guarantee valid. There are number of popular brands offering high performance wood stains and paints such as: Sadolin, Ronseal, Sikkens or Dulux and they are largely available to purchase online or at major DIY retailers. Some of them even offer extensive weather protection guarantees and of course a number of colours to choose from including the most popular oak and mahogany colours in a variety of shades.
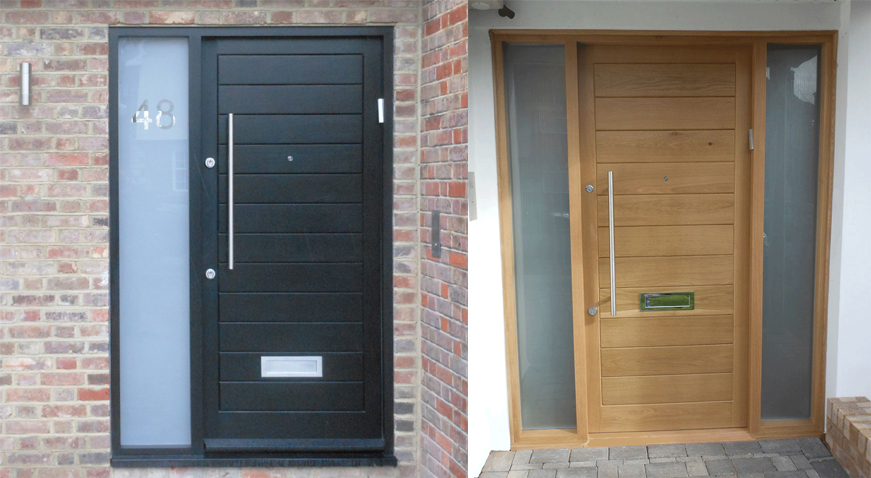
Modena style door sets – black painted and light oak stained
Dulux has a range of high performance exterior paints and stains called Weathershield with 6 and 10 years of weather protection guarantee. Because Dulux is a rather decent and reputable brand (the price seems reasonable too), it might be worth to start from checking these products:
Dulux Weathershield Exterior Gloss Paint
Dulux Weathershield Exterior Satin Paint
Dulux Weathershield Ultimate Woodstain
Dulux Weathershield Ultimate Opaque
You will also need a base coating product also known as preservative primer or undercoat. You should buy the base coating product recommended for use with your finishing product to avoid any unexpected chemical reactions between the two.
As an example if you are planning to use Dulux Weathershield Paint, Dulux recommends this product for base coats
Note: We don’t endorse Dulux or any of the shops linked to in this article, we simply use Dulux products as an example of high performance external wood treatments and we strongly encourage searching for similar or alternative products on the market.
Application – instructions for finishing external wooden doors
Finishing external wooden doors is easy as long as you have made all necessery preparations, so start with preparing all your components and materials. If the door or frame needs to be trimmed, do it before applying any treatment. Protect glass with masking tape and foil sheets. Cut the holes for all door hardware (hinges, locks etc.) and clean them from saw dust and splinters. Sand all door surfaces (faces and all edges) and clean them from dust. Use wood filler in a matching colour to the door to fill any minor imperfections, dents or scratches.
Warning! High performance wood treatments are usually highly flammable and toxic, so make sure to work in well ventilated areas, away from fire sources and out of children’s reach. Wear rubber gloves as the marks from high performance stain/paint can be very difficult to clean.
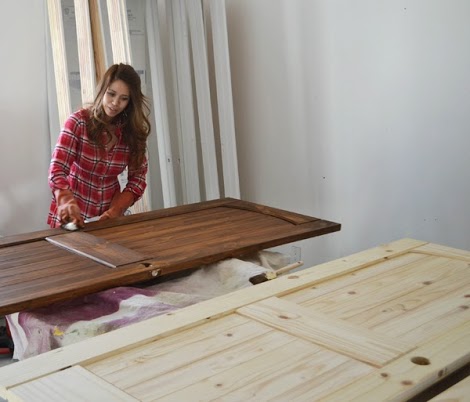
Always paint or stain doors in secure, flat position to prevent bowing. Image by ana-white.com
Tip: Decorator’s sponges and clothes are great for applying wood stain. If you are planning to stain the door, check this useful How to Stain Guide from WikiHow

When staining, always wipe off excess stain after approx 1min with a cloth
Apply the base coats and finishing coats according to the instructions on the tin but with a minimum of 2 base coats and 3 finishing coats at the right time intervals specified on the tin (usually 12-24h is required between coats for the treatment to dry and become absorbed by the timber). Make sure to coat evenly all areas of the door including top and bottom edges, and in any cut outs made for hinges, locks and other door hardware. Always sand the door lightly between the coats and clean the surfaces from dust.
Once the door had the required number of coats and all cut outs and edges had been finished so there is no untreated timber exposed anywhere, the door is ready to be hanged. Install all door hardware now and hung the door in the frame.
Don’t throw away the left over stain or paint, you will need it later (base coating products however won’t be needed anymore and could be used elsewhere or disposed safely).
Maintenance and After Care
Even if you have used a finishing product with long life expectancy, make sure to inspect your front door at regular intervals, minimum once a year to check for any signs of the finish wearing off and re-coat when required. Excessive amount of rain or sunlight can wear off even the best wood treatment faster than expected so make sure to keep an eye on it.
I got bored with the colour of my door, can I change it? Yes, you can always apply 1-2 coats of different colour treatment as long as it’s the same product! Applying different products on top of each other may cause unknown chemical reactions so it’s not recommended. Make sure to give it good sand and clean before applying the new colour. If for any reason you need to change the product completely, you will probably need to sand the door to bare timber and start again from applying base coats.
So what’s the life expectancy of my door and finish? The doors are usually guaranteed for 10 years, subject to appropriate finishing but they should last a lot longer. The finish needs to be maintained as with any other timber products and in normal circumstances it should be reapplied every 2-3 years or as soon as you see any signs of weathering.
Did you find our guide useful? Share your thoughts in the comments below.